
What you'll learn: This updated guide walks home cooks through science-backed, repeatable steps to make restaurant-quality crispy tofu without deep-frying. You'll get current best practices on pressing, coatings, and three cooking methods (skillet, oven, air fryer), plus 2026-relevant product notes, appliance advice, and food-safety reminders. This is written for food enthusiasts who want dependable results for weeknight bowls, sandwiches, or feeding guests.
Note: I include food-safety reminders and cite trusted sources. If you have food allergies, a compromised immune system, or specific dietary needs, consult your healthcare provider or a registered dietitian before changing food practices.
Prerequisites: what to know before you start (and why it matters)
Making crisp tofu comes down to two chemical/physical realities: minimize surface and interior water, and create a surface that browns and resists steam. The basics haven’t changed, but a few product and appliance trends in 2024–26 make this easier for home cooks:
- Tofu types available: Extra-firm and super-firm remain the reliable choices for crisping. In recent years more retailers carry vacuum-sealed “pre-pressed” or “ready-to-cook” tofu; these shorten prep time because the packaged product contains less free water.
- Starch and coating options: Cornstarch is still the most forgiving single starch for an even, pale-gold crust. Potato starch and tapioca remain useful for texture variation. Since 2023 a number of commercial “crisp coating” blends (rice flour + cornstarch + seasoning) have become common in supermarket bakery/ethnic aisles; they save time and provide consistent results.
- High-heat oils: Use refined oils with high smoke points—refined avocado, grapeseed, high-oleic sunflower, or peanut oil (if no allergy). These oils tolerate pan temperatures used to set a crust without burning.
- Cookware & appliances: Nonstick skillets, heavy stainless with good heat conductivity, and well-seasoned cast iron all work. Newer air-fryer models (2024–26) emphasize improved airflow patterns; that means less crowding and more uniform browning. For oven baking, use a wire rack over a sheet pan for airflow under pieces.
- Food safety basics: Store unopened tofu at refrigerator temperatures recommended on the package and keep opened tofu in fresh water changed daily. Follow USDA and FDA guidance for perishable refrigerated products.
Step 1: Pick the right tofu and cut for maximum crust
- Choose extra-firm or super-firm tofu. Labels like “silken” or “soft” won’t yield a good crust.
- Consider pre-pressed or vacuum-packed options. These reduce pressing time and are increasingly common in supermarket refrigerated sections.
- Cut to maximize browned surface:
- 1-inch cubes — bowls and stir-fries
- ½–¾-inch planks — sandwiches and salads
- Triangles or wedges — dipping or appetizers
Why: Browning (the Maillard reaction) and starch setting happen at the surface; more surface area per bite means more crispness and flavor.
Step 2: Press (or fast-dry) tofu efficiently
- Drain and blot. Open the package, drain the liquid, and blot all sides with paper towels or a clean kitchen towel.
- Press appropriate to type. For water-packed extra-firm, press 15–30 minutes using a tofu press or weighted board. Vacuum-packed super-firm often needs only 3–5 minutes of blotting.
- Quick air-dry trick: After pressing, place pieces on a clean towel and let them air-dry 5–10 minutes while you prepare coatings. This step helps starch adhere.
Why: Water creates steam during cooking that softens the surface and prevents a dry crust. Pressing reduces steam and helps starch cling for even browning.
Step 3: Season without re-wetting the surface
- Use dry seasonings first. Salt the tofu directly (about ½–1 tsp kosher salt per 14–16 oz block, adjusted to taste) and add garlic powder, onion powder, smoked paprika, or ground cumin—these won’t reintroduce moisture.
- If using soy or tamari, use sparingly. A light brush or 1–2 tsp per block adds umami; blot excess before coating. Alternatively, marinate briefly but always re-dry the surface before starching.
- Save bold or watery sauces for after crisping. Toss immediately before serving or serve on the side to preserve crunch.
Why: Wet marinades can dissolve starch coatings or create surface moisture that prevents crust formation.
Step 4: Build a reliable crisp coating
- Pick a starch. Cornstarch (1–2 Tbsp per block) is the simplest and most reliable. For variation, try:
- 50/50 cornstarch + rice flour for more color and crackle
- Potato starch for a delicate velvet crunch
- Tapioca for a brittle, glassy snap
- Optional lift: Add up to 1/4 tsp baking powder per 1–2 Tbsp starch for a slightly puffed exterior—use sparingly to avoid off flavors.
- Even application: Use a fine-mesh sieve, a shallow bowl shake, or a paper-bag method to dust pieces and shake off excess.
Why: Starch forms a film that draws remaining surface moisture and browns under heat, insulating the tofu from steam.
Step 5: Choose your cooking method (pan, oven, or air fryer)
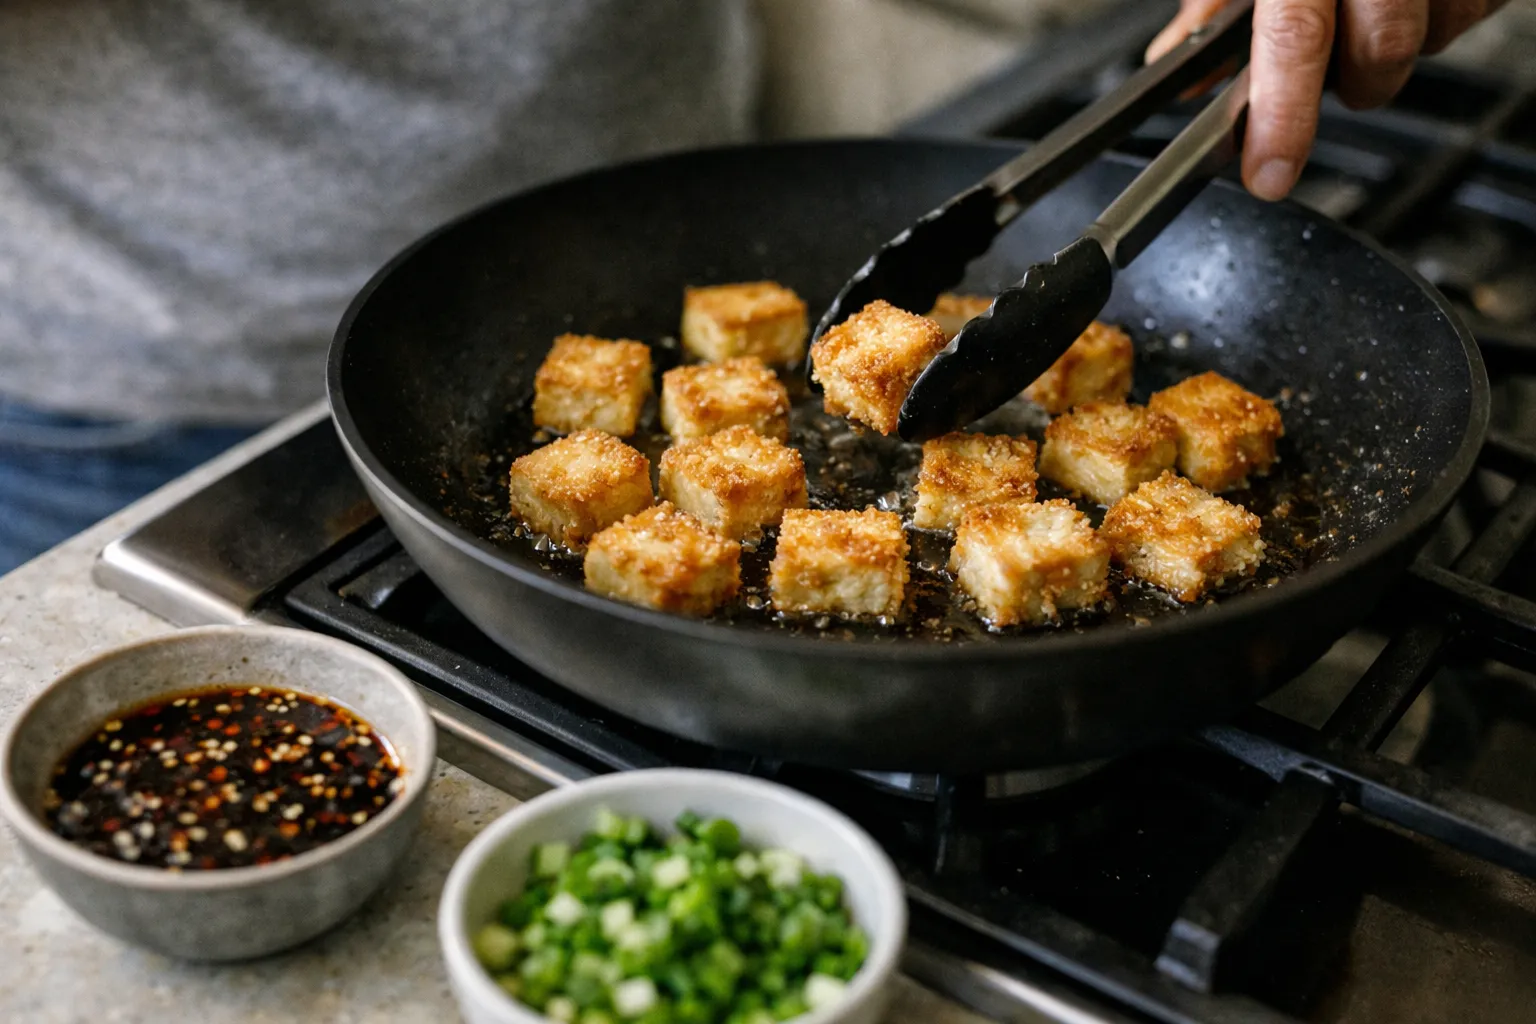
Method A: Pan-fry — fast, high-contrast crust
- Preheat skillet to medium–medium-high. Add 1–2 Tbsp oil and wait until it shimmers.
- Single layer only. Do not crowd; cook in batches if necessary.
- Leave undisturbed for 3–5 minutes. The tofu will release when a crust has set.
- Flip and brown remaining sides. Total cooking ~8–12 minutes depending on size.
- Drain on a wire rack. Resting on a rack prevents trapped steam from softening the crust.
Best for: maximum contrast between crunchy exterior and tender interior, and for finishing quickly with a sauce.
Method B: Oven-bake — hands-off and scalable
- Preheat oven to 425°F (220°C).
- Arrange tofu on a wire rack set over a sheet pan.
- Lightly oil after starching (1–2 tsp per block). Toss to distribute; oil promotes browning in the dry oven environment.
- Bake 25–35 minutes, flipping halfway. For deeper color, finish 1–2 minutes under the broiler while watching closely.
Best for: meal prep and cooking for a crowd. Re-crisp briefly in a skillet or air fryer before serving for peak crunch.
Method C: Air fryer — efficient with less oil
- Follow your model’s preheat guidance (many use 375–400°F).
- Lightly oil basket or tofu with a spritz.
- Arrange single layer; cook 12–18 minutes. Shake or flip at 6–8 minutes. Adjust time by testing one batch.
Best for: consistent results with minimal oil. Improved 2024–26 air-fryer designs emphasize clearer airflow; avoid overloading the basket.
Step 6: Sauce and serve without killing the crunch
- Decide: toss or dip. Dipping preserves texture; tossing should be done immediately before serving.
- Toss quickly in a warmed, thickened glaze. Thicker glazes cling and create less steam than watery sauces.
- Garnish last. Scallions, sesame seeds, and fresh herbs add texture and brightness without adding moisture.
Quick glaze: Simmer 1 Tbsp soy sauce, 1 Tbsp rice vinegar, 1 tsp honey or maple syrup, and 1 tsp toasted sesame oil until slightly thickened—toss with tofu immediately and serve.
Common mistakes (and how to fix them)
- Soggy tofu: Often caused by under-pressing, pan crowding, or saucing too early. Fix: press longer, cook in batches, and add sauce at the end.
- Tofu tears or sticks: Pan not hot enough or flipped too soon. Fix: preheat until oil shimmers; wait for natural release.
- Chalky coating: Excess starch or wet spots. Fix: blot thoroughly and use a lighter dusting; shake off surplus.
- Greasy tofu: Too much oil or too-low heat. Fix: use a thin film of oil and higher heat; drain on a rack.
- Bland interior: Only the crust was seasoned. Fix: season tofu before starching or finish with a punchy sauce.
Pro tips for reliably better results
- Freeze-thaw for a meatier texture. Freezing changes tofu’s internal structure and creates pockets that accept crisping and sauce differently. Chefs and food writers (for example, J. Kenji López-Alt) have long recommended this for texture change—freeze whole, thaw, then press before cooking.
- Salt timing: A light salting before pressing draws moisture toward the surface (osmotic effect). If you salt early, press and then blot again before starching so you don’t end up with a wet surface.
- Hybrid coatings for extra crunch: Dust with cornstarch, then press lightly into panko mixed with a little sesame oil for sandwich-ready crunch.
- Use a rack whenever possible. Baking and resting on a rack keeps steam from re-softening the crust.
- Meal-prep storage: Store cooked unsauced tofu in a shallow container lined with paper towels (change towels if moist). Use within 3–4 days and re-crisp in a hot skillet or air fryer before serving.
- Nutrition note: Air-frying or baking uses less oil than shallow frying; a small amount of oil improves flavor and browning. If you have dietary limits, consult a registered dietitian to tailor fat intake.
Evidence, safety, and sources
Food-safety basics: refrigerate tofu and follow package dates; keep cold foods at or below 40°F (4°C), per USDA guidance. For culinary chemistry behind crust formation and the Maillard reaction, see Harold McGee’s On Food and Cooking and practical tests from food writers such as J. Kenji López-Alt (Serious Eats). Market analysts and nonprofit groups tracking plant-based retail growth—such as the Good Food Institute—have documented expansion in ready-to-cook plant-protein formats that make pre-pressed and seasoned tofu more widely available. For appliance-specific questions (air-fryer performance and safety), consult your manufacturer’s guidance and current product reviews that test circulation and capacity.
FAQ
Do I have to press tofu to make it crispy?
No—not always. Vacuum-sealed “pre-pressed” super-firm tofu often crisps well after blotting. For water-packed extra-firm tofu, pressing 15–30 minutes gives the most reliable result because it removes the free water that creates steam and softens the exterior.
Which starch gives the best texture?
Cornstarch is the most forgiving for a light, even crust; potato starch gives a delicate velvet crunch; tapioca delivers a brittle snap. Many cooks use blends (cornstarch + rice flour) to balance color, crunch, and browning.
Is air-fryer tofu healthier than pan-fried tofu?
Air-frying typically uses significantly less oil than shallow pan-frying, which reduces added fat per serving while still producing a crisp exterior. However, small amounts of oil improve browning and flavor. If you have medical or dietary concerns, discuss specific recommendations with a registered dietitian or clinician.
How should I store cooked tofu for meal prep?
Store cooked, unsauced tofu in the refrigerator in a shallow container lined with paper towels (change towels if they become damp). Use within 3–4 days. Re-crisp in a preheated air fryer (375–400°F / 190–205°C) for 3–6 minutes or in a hot skillet with a little oil for 2–4 minutes before serving.
My tofu edges burn before the center browns—what's wrong?
Likely heat is uneven or too high on the outer surface; reduce to medium–medium-high and make sure the oil is hot but not smoking. For thick pieces, consider finishing in a 425°F oven after an initial skillet sear to allow the interior to warm without over-browning edges.
Final note: Crisp tofu is manageable once you balance moisture control, choose the right starch, and give heat and airflow the space they need. With improved ready-to-cook tofu options and better-designed air fryers in 2026, you can achieve a restaurant-style crunch reliably at home. If you want a recipe-specific tweak (Asian glaze vs. sandwich crumb vs. Mediterranean spice), tell me the dish and I’ll tailor the technique.